
Elementor is a popular website builder plugin for WordPress. It comes packed with powerful features that can take your website to the next level. This article describes how to add meta tags in Elementor.
Why meta tags are important
Meta tags (<meta>) are used to convey information, or metadata, about an HTML document, similar to how a book index provides information about places, terms, people, and other data discussed in the book itself.
Meta tags are intended to provide information to different entities such as web browsers, search engines and other web services for different purposes. For example, web browsers use the “viewport” meta tag to establish a viewport size and scale. Search engines use the title tag and “description” meta tag to display a web page in their result pages (SERPs). Web crawlers such as Google bots refer to the “robots” meta tag to know if they should crawl and index your website or specific parts of it. Google also uses meta tags to verify website ownership when using some of their services, including Google Analytics and Google Adsense. The OpenGraph protocol introduces the “property” attribute to meta tags, which is used to translate a website content to social media graph objects.
Meta tags are crucial in the digital ecosystem. While you don’t have to include them in your website, doing so will make a huge difference in terms of traffic and performance.
How to add meta tags in Elementor
Add meta tags using Elementor Pro Custom Code feature
Elementor has a built-in feature that allows you to add Javascript, HTML and CSS snippets to your site. Meta tags can also be added to a site using this feature. However, this feature is only available in the PRO version.
It’s worthy to note that this method comes with certain limitations and is best suited for when you want to add static meta tags to your site. However, there are times that you will want to set meta tags dynamically, for SEO for example. In such cases, this method is impractical.
To add meta tags to a site using Elementor’s Custom Code feature:
- From the Admin Dashboard sidemenu, go to Elementor > Custom Code.
- Click on “New Code”.
- Add a title to help you identify your code snippet.
- Select
<head>in the location dropdown. - Select a priority level (lower levels are executed first).
- Add your meta tags in the text editor.
Elementor determines the order in which code snippets are added to a page using the priority level setting. Lower numbers mean higher priority.
Add meta tags in Elementor using a third-party plugin
One thing that has made WordPress so innovative and popular, is its plugin ecosystem. There is one for virtually anything you can think of. However, this comes with its own set of caveats. For example, plugins often include functionality you don’t want or need and will never use. Only a very small amount of plugin developers make the effort to include controls to disable functionality. This overhead can also slow down your website in a world that increasingly values immediacy. So, it’s important to understand and consider any potential consequences of using this approach. In some cases, hiring a developer for a custom add-on can be a better option.
If you have decided that a plugin is the way to go, here are some recommendations.
Meta Tag Manager
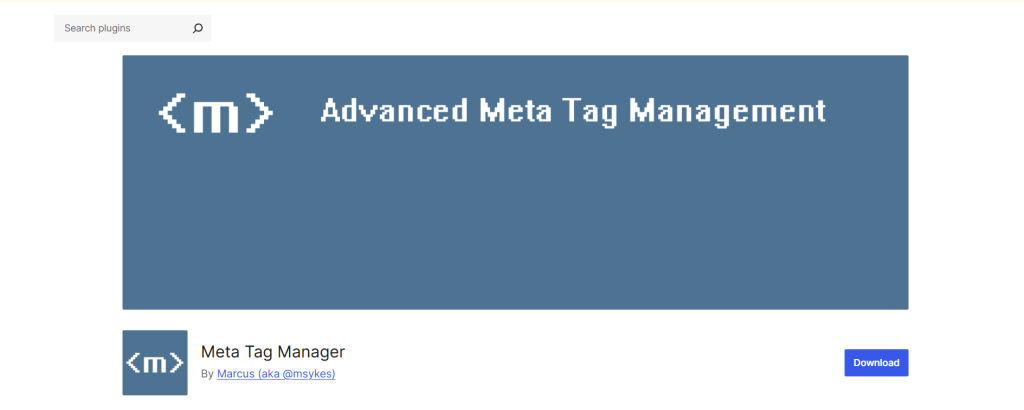
Meta Tag Manager is a very solid option. Don’t let its simple visual identity mislead you. Its free version offers pretty much everything you need to add meta tags to your website. It includes a meta tag builder and wide support for structured data and open graphs, search engine verification (Google, Bing, X, etc.), custom post types. It has a very straight-forward user interface and includes predefined meta tags.
The PRO version starts at $49 USD (at time of publishing) and adds advanced functionality such as display/exclusion contexts, dynamic placeholders, unique tag detection and overriding and shortcode support.
Meta tag manager is intended to be used by people with some HTML background and an understanding of meta tags.
Add meta tags using WordPress native functions.
In some cases, you might need to add meta tags dynamically. Plugins like Meta Tag Manager, in its paid version, have extra functionality that can help you achieve this.
However, in some cases, writing a custom code snippet can offer way more flexibility and allow you to include all kinds of meta tags based solely on a blog post’s data, or on information available in the internet. For example, blog posts and articles in an online publication may have different authors, deal with different subject matters, and release content periodically. You might want to reflect all of this in your meta tags.
It’s also possible to integrate other tools and services through APIs. For example, if you have a movie review website, you can use an API to pull metadata from a service like IMDb and output a structured data schema on every one of your reviews.
This method avoids all the fallbacks of other methods. However, some degree of technical knowledge is necessary to avoid breaking your site.
Add meta tags by hooking into wp_head
For those unfamiliar, hooks are one way to alter WordPress behavior. Hooks allow you to pass a function to WordPress to be executed at a specific point during its execution cycle. Put simply, hooks work like queue of actions that WordPress will execute at a specific point.
For example, the wp_head hook is executed by WordPress after it outputs scripts and other data inside the <head> tag in the front end. Once WordPress finishes executing each action hooked into wp_head, it will close the <head> tag. As a matter of fact, this is the same hook Elementor’s Custom Code feature uses to add your code snippets into a page.
So, how is this different from using Elementor’s Custom Code feature? Simple. Elementor’s Custom Code feature prints your code snippet as is. If you want this content to be output dynamically, you must have certain logic to be executed by the server first. And this behavior is not possible inside Elementor’s Custom Code feature.
To hook into wp_head, you must use the add_action() WordPress function. This function takes a minimum of two parameters: the name of the hook you want to hook into, and a callback function, which is where you will add your logic. In the following example, we’ll hook a function called custom_function into wp_head. Note that there is a third parameter with a value of “1”. This parameter is the priority level and it’s optional. However, since we want our function to be executed as soon as possible we must include it in this case. Hence, the 1.
add_action( 'wp_head', 'custom_function', 1 );
function custom_function() {
  // Do something here
}
You can then use the echo, printf PHP functions to print the desired data. In the following example, you will notice we are printing Dublin Core vocabulary meta tags using a blog post content. Please note that the Dublin Core vocabulary conventions are beyond the scope of this post.
function custom_meta_tags_cb( $post ) {
	echo '<link rel="SCHEMA.DC" href="http://purl.org/dc/elements/1.1/" >';
	$metatags = [
		'dc.title' => get_the_title( $post->ID ),
		'dc.date' => get_the_date( $post->ID),
		'dc.description' => get_the_excerpt( $post->ID ),
		'dc.language' => get_locale()
	];
	foreach ( $metatags as $name => $content ) {
		printf( '<meta name="%1$s" content="%2$s">' , $name, $content );
	}
}
add_action('wp_head','custom_meta_tags_cb', 1 );
The code above will print something like this.
<head>
	<meta name="dc.title" content="Post Title">
	<meta name="dc.date" content="mm-dd-yyyy">
	<meta name="dc.description" content="Long string of text (the excerpt)...">
	<meta name="dc.language" content="en">
	<!-- More tags -->
</head>
A lot can be done parting from this simple code snippet. For example, you can add conditionals to, let’s say, print meta tags in a custom post type called my_custom_post_type.
function custom_meta_tags_cb( $post ) {
	if (get_post_type() === 'my_custom_post_type') {
		$metatags = [
			'dc.title' => get_the_title( $post->ID ),
			'dc.date' => get_the_date( $post->ID),
			'dc.description' => get_the_excerpt( $post->ID ),
			'dc.language' => get_locale()
		];
		foreach ( $metatags as $name => $content ) {
			printf( '<meta name="%1$s" content="%2$s">' , $name, $content );
		}
	}
}
add_action('wp_head','custom_meta_tags_cb', 1, 1 );
There you have it! A code snippet to add meta tags to your Elementor website using WordPress native functions. Deploying this code snippet in your website can be achieved through different means such as:
- Appending the code snippet to your theme’s
functions.phpfile. - Appending the code snippet to a plugin’s
functions.phpfile. - Creating a custom plugin or add-on.
Develop a custom Elementor Add-on or WordPress plugin
Do you need a tailored solution? Acustom Elementor Add-on can be a great solution to add meta tags to your website.
As a business owner myself, I believe solutions should be tailored to businesses as opposed to tailoring businesses to a given solution. Elementor has a great toolset but the Custom Code feature in its paid version is best for outputting static content. Plugins, on the other hand, come with their own limitations. One of the most impactful being they come packed with extra functionality you might not need or want while rarely including options to disable them.
Developing an Elementor add-on can be a great option if you
- Don’t have the required technical knowledge in your team.
- Want a solution tailored to your business needs.
- Want to reduce or keep the number of plugins in your website in check.
- Want to reduce ant expenses resulting from multiple plugin subscriptions.
- Need or want very specific functionality.
- Want to avoid plugin overhead.
If this sounds like you, let’s talk!
Closing notes
There are numerous ways to add meta tags to your Elementor website. Each with its own caveats. Regardless of what the internet says, the best way to do so will be dictated by your specific needs and limitations. Some solutions can work great in the short-term and it’s okay to change course.
If you’re still dubious, leave a comment below. I’ll be happy to clarify or answer your questions.
Need help managing your website? Send me a message.
Thanks for reading! Let me know in the comments if you found this article helpful.
Do you need a custom Elementor add-on or WordPress plugin? Reach out!
Deja un comentario